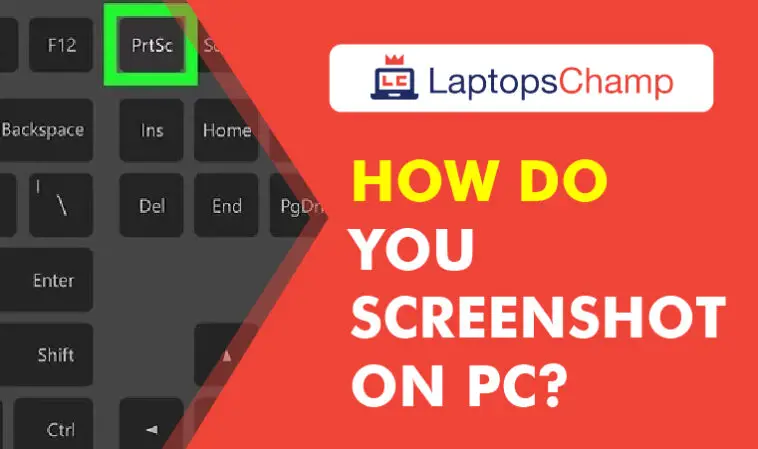
How Do You Screenshot On Pc? Who has not used the option to take screenshots on the computer? In fact, we do it almost daily. Many capture on their smartphones, others from their home PC. When you are surfing the Internet, and you see something interesting, you immediately take a screenshot.
However, despite the fact that it is easy to capture, some people do not handle the tool well, perhaps due to ignorance or because the machine does not have this option. In that sense, we can find some alternatives to make the so-called screenshot.
The screenshots on the computer are beneficial and necessary. For example, when a problem occurs on the computer, it allows you to show someone who can help you, among other things. But, without a doubt, the best thing is that you do not have to download any additional programs or software or pay for them.
Taking a screenshot is an important skill for young people and parents to have. This article will show you how to Screenshot an image on your mobile phone, computer, or tablet.
Not only are screenshots useful for demonstrating computer programs and accessing online resources when you don’t have an internet connection, but they are essential for recording evidence of cyberbullying.
It must be acknowledged that screenshots can be used to instigate bullying, as they allow the taker of the screenshot to copy incriminating photos and messages. However, in order for a young person to be prepared to handle cyberbullying situations, it is crucial that he/she knows how to record evidence of cyberbullying by taking screenshots.
In Windows, you can take a screenshot using the keyboard. In fact, it works the same on almost all computers.
How Do You Screenshot On Pc?- Shortcuts to master them all
1. Take a Screenshot with Print Screen (PrtSc)
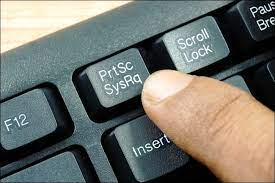
The Print Screen key on your keyboard can take a screenshot. Depending on the keyboard shortcut you use, you can save the screenshot as a PNG image file or copy it to your clipboard so you can paste it into any application.
The prtsc key is usually found between the F12 key and the Scroll Lock key on the top row of your keyboard print screen button may be labeled something like “PrtScn,” “PrntScrn,” or “Print Scr” instead. On full-size keyboards, look above the Insert key.
On laptop keyboards, the Print Screen key may be combined with another key, but it will be located in that general area of the keyboard. You may have to press your laptop’s “Function” or “Fn” key while using the shortcuts here.
2. Using the keyboard
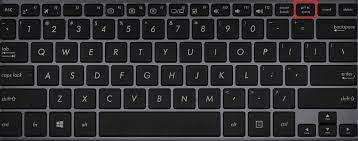
Taking a screenshot is simple; you just have to do a few steps:
To make the capture, the area must be visible. I press the button Print Screen or Print Screen, usually located on the top right of the keyboard.
You can also press Alt + Print Screen to capture a part of the active screen.
If you press the Windows key and Print Screen simultaneously, you will be taking a full-screen screenshot that does not remain on the clipboard but is instead automatically saved in your default folder for captures. It is a valuable shortcut, especially when you are going to work with several captures, and you do not want to have to paste them first in an image editor.
Of course, one thing you have to be clear about is that this shortcut captures everything that is seen on the screen captures.
This means that if you want to capture only the active window or a portion of the screen, you will have to resort to the rest of the shortcuts, but this is the only one that saves the image automatically without having to do more.
The capture will be saved in PNG format, so you will have to go through some other editor if you need to use it in another format.
Also, if you need the capture only to show a specific window or part of the screen, you will also have to go through the editor.
The screenshot will be saved inside the Screenshots folder that you will find in Images on your computer screen; that is, once you press the shortcut, you will only have to go there to see the capture and take it wherever you want. If that location does not convince you, we have already explained how you can change it.
You can also press Windows + Alt + Print Screen at the same time for the Windows key print screen, a second shortcut that will do precisely the same as the previous one, but instead of taking a screenshot of the entire screen, you will only have the image of the window or application that you have active. Thus, if you don’t want to take a screenshot of the entire desktop, you won’t have to go through Paint to cut out just one application.
3. Paste the capture
You should have previously opened the Paint program. Once done, click on the ‘Paste’ button, located at the top left. Choose the Edit option and then Paste, or press Ctrl + V on the keyboard to paste the screenshot. These instructions work the same on all computers. Paint is handy for editing screenshots.
4. Save the screenshot
Click on the main option ‘File’ in the upper left, followed by ‘Save As.’ Name the image and select the file format. JPG will do fine for most cases, but there are other formats available: PNG, BMP, GIF, etc. After choosing, save the image. And ready!
5. Change the location of the screenshots
The first thing you have to do is go to the current folder of screenshots. To do this, open Windows File Explorer, and in the left column, you will see a series of shortcuts on Quick Launch. Click on the Images file because inside this folder is where the screenshots folder is.
When you are inside the images folder, right-click on the Screenshots folder. A drop-down menu will appear; you have to choose the Properties option to start managing it.
Once you are in the properties panel, press the Location option from the top menu. You will go to a screen where the captures are now saved, and you will have the option Restore defaults to go to the default location. Move to change the location by moving the content and Search destination so that the currently chosen folder will be opened. Click on the Move option.
Doing so will open up a dialogue with an explorer. In it, you have to choose the new folder in which you want to save the screenshots. Select it by clicking on it and hitting the Select folder button. Windows will ask you to confirm the action, and when you do, your screenshots will go where you have chosen from now on.
Alternatives
1. Using Clipping (Or Snipping Tool)
The snipping tool app has been around since Windows Vista. Windows has warned for a couple of years that the Snipping Tool is moving away, but it’s still kicking around, including in Windows 11. The Snipping Tool has been delisted from the list of apps from the Start menu, but it’s easily accessible via the search bar.
Click the New button to begin the screenshot process. The default snip type is a rectangular snip, but you can also take free-form, full-screen, and window snips.
The Snipping Tool does not automatically save your screenshots — you will need to manually save them in the tool before you exit — and it does automatically copy your captures to the clipboard.
There are alternative methods that can help you capture. The best is Windows 10. We are talking about the Snipping Tool, the tool built into Windows.
This clipping program is quite useful, as it allows users to better define and capture the desired part without needing the keyboard.
How to use it? Open the program and then choose the options they give you: ‘Freeform Capture,’ ‘Windows Capture,’ or ‘Rectangular Capture.’ You can also set it to delay the capture time if you try to get a precise moment in a video or animation.
This tool was recently updated, and the image editing functions were enabled with the ‘Crop and Annotate’ application, allowing this option to capture an image and view it in thumbnail, and then take it and edit it directly in said application.
2. Snip & Sketch
The Snip & Sketch tool is easier to access, share and annotate screenshots than the old Snipping Tool. And it can now capture a screenshot of a window on your desktop, a surprising omission when the app was first introduced that kept us on Team Snipping Tool until recently.
The easiest way to call up Snip & Sketch is with the keyboard shortcut Windows key + Shift + S. You can also find the Snip & Sketch tool listed in in the alphabetical list of apps accessed from the Start button as well as in the notification panel where it listed as Screen snip. Or you can just search for it if you don’t commit the keyboard shortcut to memory. (If you’re a frequent screenshot taker, we recommend pinning the app to the taskbar.)
Snip & Sketch (Snip & Annotation, in Spanish) is the latest option from Microsoft. You can access it from the Start Menu or with the Win + Shift + S keys on your keyboard.
If you use the keyboard shortcut, the screen will go dark, and you will see a toolbar with five buttons at the top. You will have the same functions as the Snipping Tool, but your screen recording or captures will not be saved as a file. Instead, the image goes directly to the clipboard.
You will see a bar of several buttons near the top of your screen in the Sketch app. Select the function you want. From left to right, here’s what the buttons do:
- Rectangular Snip: You will be able to draw a rectangle over your screen with your cursor. Windows will save a screenshot of the area inside the rectangle.
- Freeform Snip: You can outline an arbitrary shape on your screen with your cursor (or a stylus or finger on a touch screen). Windows will save a screenshot of the area you draw around.
- Window Snip: The cursor will function as a crosshair. You can position it over a window and click to take a screenshot of just that window.
- Full-screen Snip: This button takes a screenshot of your entire display.
- Close Snipping: Close the overlay without taking a screenshot. (You can also press Esc on your keyboard to do this.)
Snip & Sketch will remember your last used option when you use the keyboard shortcut to open it.
3. Take Screenshots the Easy Way With SnagIt, a Powerful Tool
Windows 10 is packed with useful screenshot features and Greenshot is a powerful screen capture tool, but each of the above methods has its own limitations. If you take a lot of screenshots and want more flexibility and options, you might want something even more powerful.
If you don’t mind spending a few dollars on a screenshot tool, SnagIt by Techsmith is an incredibly powerful screenshot application. It makes taking screenshots easy and has features for targeting specific windows and capturing the full text of scrolling windows like web pages in your browser.
SnagIt can also record videos of your screen, turn them into animated GIFs (if you like), add video from your webcam and audio from your microphone, and help you easily trim those video clips so you can only include what’s important.
Beyond that, SnagIt can extract text from screenshots, annotate them, replace text in the screenshots, and do pretty much else you imagine a screenshot tool should be able to do. It’s a great application that we recommend, especially if you need to take a lot of screenshots.
4. Windows Game Bar
If you want to take a full-screen snap or want to record a video of your screen, another built-in app has you covered. It’s the Windows Game Bar (sometimes also named the Xbox Game Bar). To access the Game Bar, press Windows + G at the same time. The popup that appears will have buttons for taking a screenshot, recording gameplay videos, and other features.
To take a screenshot without opening the bar first, use the keyboard shortcut Windows + Alt + Print Screen. (You may also need to hold the Function key simultaneously if you’re on a laptop keyboard). A notification should appear telling you that the screenshot was saved, and by default, it goes to the ‘Captures’ directory of your Videos folder.
It’s also simple to use Game Bar for taking screenshots in games, but the two specialized recommendations below are better for Steam and Nvidia users.
5. ShareX
If you’re looking for more features (and don’t mind downloading an additional tool), you should check out ShareX. It can capture full-screen or partial images in multiple formats and has some crazy powerful automation tools. Want to set it up to take a screenshot of part of your screen every 3 seconds? Need a built-in color picker? Record a GIF? Copy a screenshot to the clipboard. Set up your own custom keyboard shortcuts.
Once you’re ready to show off your shot to the world, you can upload your capture to over 80 services without leaving the application. ShareX can upload screenshots directly to Imgur, Twitter, Google Photos, Dropbox, OneDrive, and dozens of other services in just a few clicks. That means less time fumbling with the Twitter web app to share your new house in The Sims and more time you can spend playing games.
There are more advanced features you can play with, too, like image filters, watching a folder for new images (so you can use ShareX to upload images saved by other applications), blurring sections of a photo, and even adding text.
ShareX can do so many things, it’s a bit intimidating to use, but there’s nothing better
Conclusion
When we talk about taking a screenshot on Windows 10 and taking a screenshot on Windows 7 or Windows 8, we understand that while the primary methods and key combinations remain the same irrespective of which version of Windows we use, there are some variations with features of image editing tools and their location on the desktop and this largely varies depending on the version of Windows operating system.
Learn how to take a screen capture on a PC, and you will acquire the ability to capture in an instant what you have on your monitor within a practical image that you can share or simply archive in case you need it in the future.
We hope this article answered the queries about how to a screenshot on Windows. This article will be a helpful resource for users exploring the interesting world of screenshots.
Frequently Asked Questions:
1. How to save screenshots instantly?
Answer: When we press the Windows Key + PrtScn Key together on the keyboard, the screenshot is saved as an image in the Pictures library instantly. There is no need to paste the screenshot to any image editor tool.
2. Why are screenshots not saved?
Answer: It is possible that screenshots are not saved, and this happens when the folder name Screenshots does not have permission to write and therefore Windows 10 is unable to save screenshots. To enable these permissions, we need to right-click on the folder named Screenshots and select Properties.
Next, we need to click on the Security Tab and then on Edit to enable permissions.
3. How can we screenshot multiple pages in Windows?
Answer: When we want to take multiple screenshots in Windows, we can use a combination of some keys on the keyboard. Press the Ctrl key + Alt key together and the PrtScn key. A red rectangular box is created on the screen and using the left key of the mouse, we can drag the rectangle on the scrolling window to select the desired pages.
4. Why can’t I take screenshots in Windows 10?
Answer: Sometimes the presence of the F Mode key or F Lock key on the keyboard disables the PrtScn key, and the user is unable to take screenshots using PrtScn in Windows 10. These keys need to be pressed again in order to enable PrtScn to take screenshots in Windows.


